A colleague of mine once said “the body is cement waiting to harden”. Nowhere is this more true than the countless hours we spend working. Regardless of the job, most people sit for a large amount of time while working. Some people use a standing desk. My preference is a desk that allows you to alternate between sitting and standing (Varidesk is a leader in this market). Regardless of sitting or standing, we are primarily static while we work. This is unavoidable to a degree. The best we can do is create an optimal ergonomic workplace and take frequent breaks.
The Chair
More important than any specific brand or style of chair is the adaptive capacity of the chair. Ultimately, the chair should adapt to you and not the other way around. The three most important aspects to consider in a chair are:
- What is the shape of the seat surface? The seat surface needs to be essentially flat. If the surface is at all concave, it will bias your hips into an internally rotated position, which can cause tension and pain in your hips and/or low back.
- How high and how low does the chair go? The chair needs to have good height variability so that you can find the optimal height for you, taking two variables into account:
- Your feet must be on the floor or resting firmly on a support.
- Your arm angle in relationship to your keyboard (see below).
- How adaptable are the arm rests? Do they go up, down, forward, and back? If your arms are not well-supported, they act as a weight on your neck. Your arms need to be unloaded.
If your chair does not meet these basic three principles, you may consider making a change.
Optimal Posture
Unsupported Sitting
Unsupported sitting is sitting without using the chair back. Move towards the front of the seat so that more than 50% of your thigh is off the edge of the surface. Slouch and sit up tall to find a comfortable neutral position for your lower back. Maintain this comfortable middle position and shift your weight slightly forward (from your hips) to the front edge of your sit bones.
- Can swing one leg behind to help maintain forward position (‘kickstand’)
- Can use towel under back of pelvis or wedge to keep you positioned slightly forward
Supported Sitting
Supported sitting is sitting while utilizing the chair back for support. Your bottom should be fully at the back of the seat. Slouch and sit up tall to find a comfortable neutral position for your lower back. Maintain this comfortable middle position and shift your weight slightly backward (from your hips) to the back edge of your sit bones until you feel the contact surface of the chair back supporting you. Notice if the chair back completely supports a comfortable alignment. If there are any areas that lack support (almost always), use thin towels or pillows to conform the chair to meet the needs of your chosen alignment.
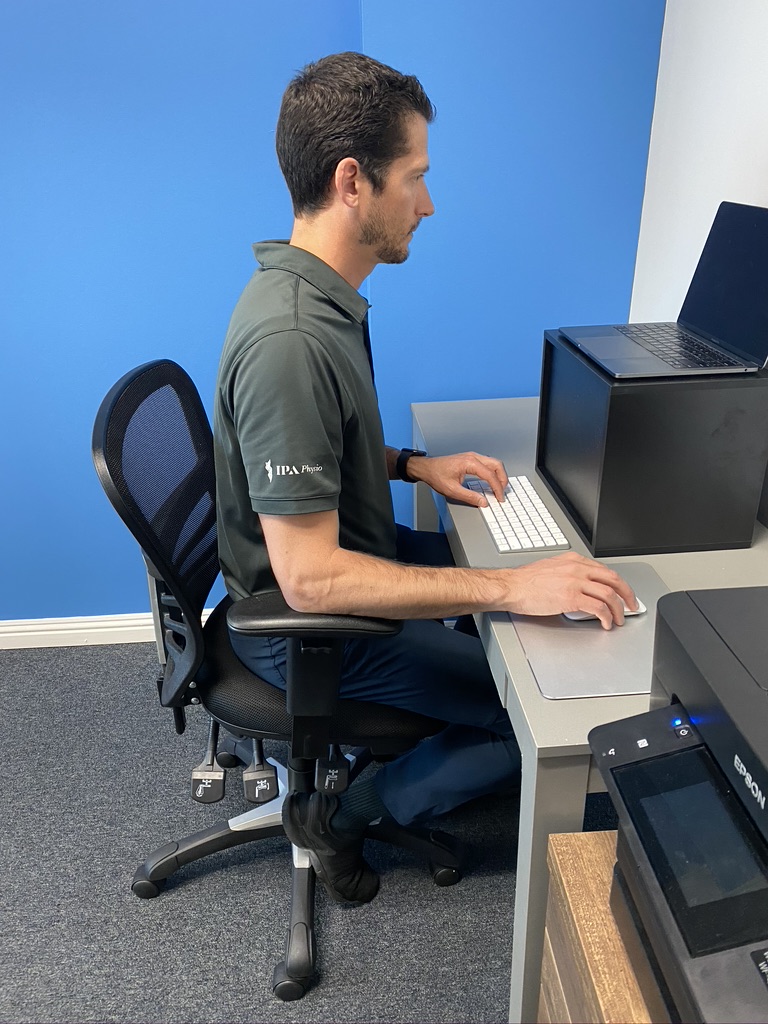
Unsupported sitting (not using chair back) 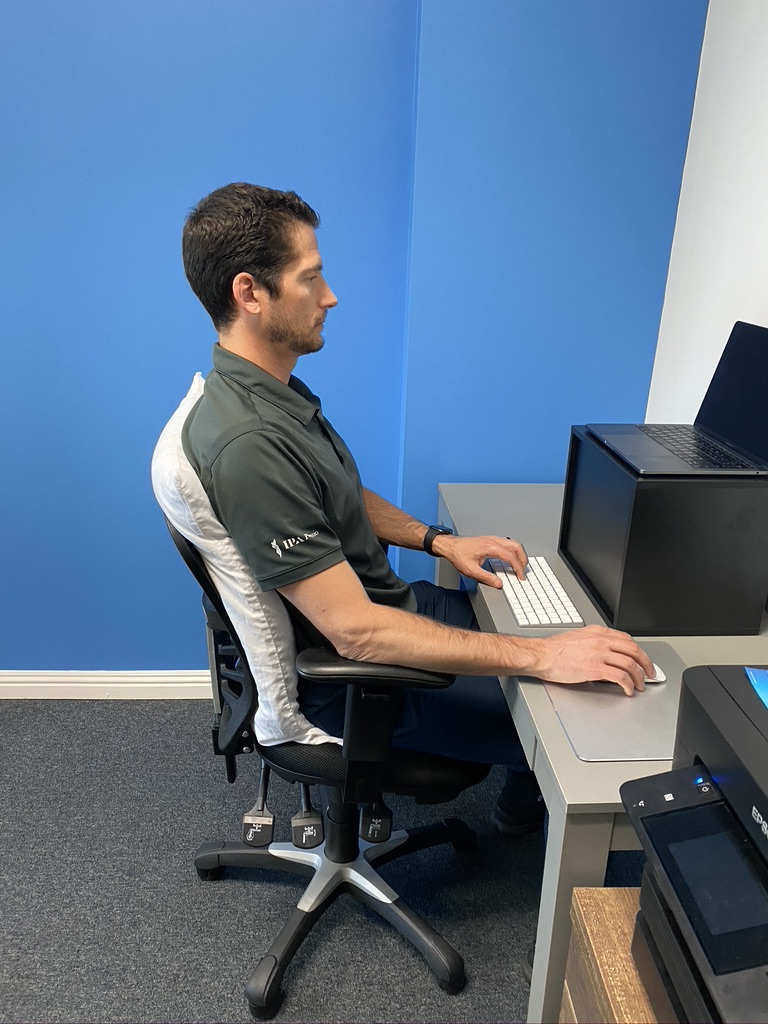
Supported sitting (utilizing chair back)
Standing
Stand with your weight equally balanced in your feet. You should feel equal pressure between the left and right foot and equal pressure between the back and the front of each individual foot (with your weight in the middle of each foot). Knees relaxed. Rib cage aligned vertically over hips. You may feel like you are leaning forward slightly. Try staggering your stance to alternate weight distribution.
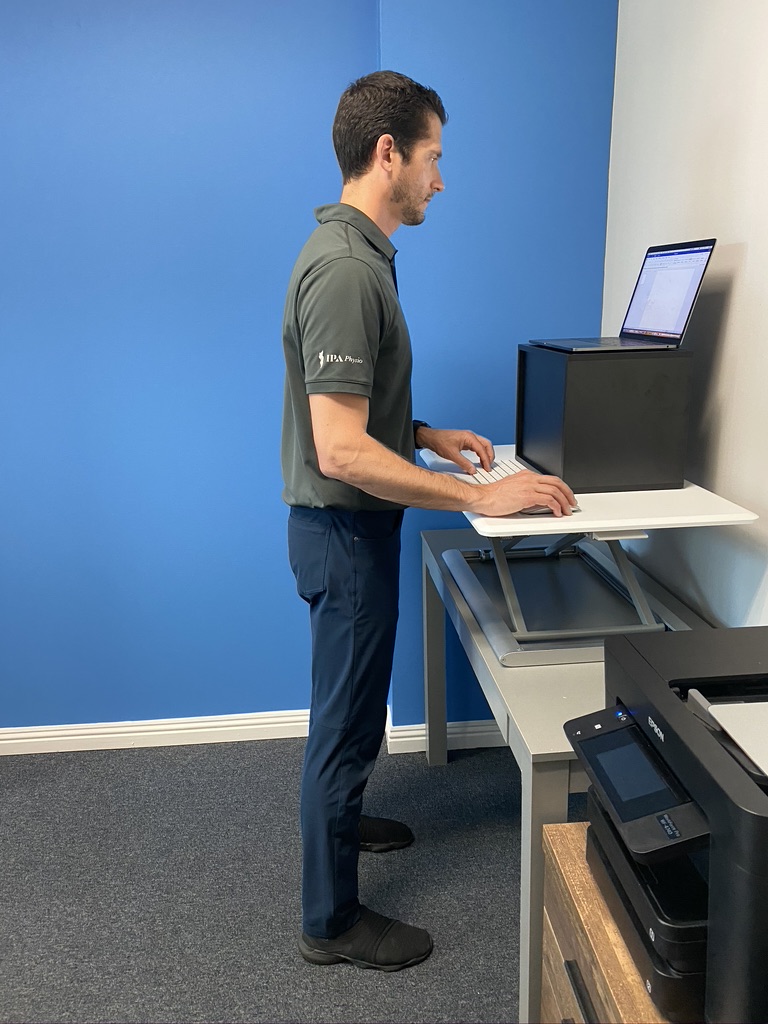
Standing with laptop raised, but lack of forearm support. 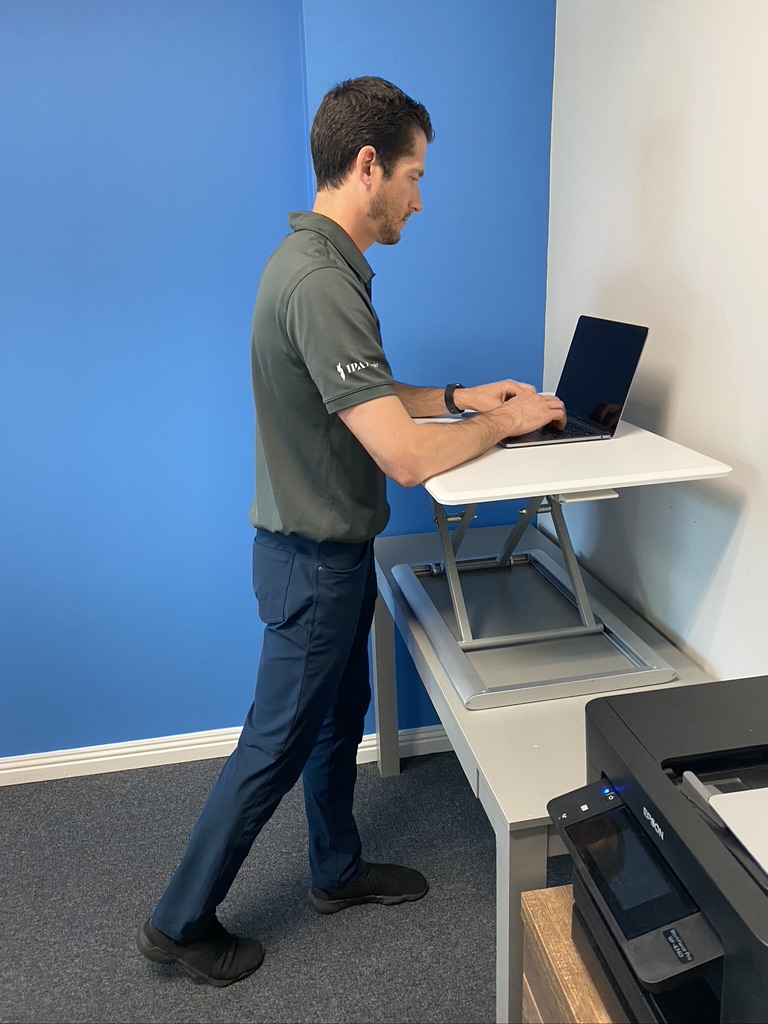
Standing in stride stance with monitor lower than optimal, but utilizing forearm support
Shoulder and Neck Alignment
Whether sitting or standing, your shoulders need to be open and your neck needs to be lengthened.
- Sitting
- Bend your elbows to 90°.
- Keep your elbows against your sides and rotate your hands outward.
- Feel your chest open and shoulder blades come together.
- Maintain this shoulder blade position as you rest your forearms on the chair’s arm rest and return your hands to work position.
- You want to maintain your head and neck in a midrange, relaxed position. You can find this by looking up and down (or nodding ‘yes’) and stopping at a relaxed position with a slight bias towards chin down.
- Standing
- With your arms straight, rotate your palms facing forward.
- Feel your chest open and the shoulder blades come together.
- Maintain this shoulder blade position as you rest your forearms on your desk and return your hands to a work position.
- You want to maintain your head and neck in a midrange, relaxed position. You can find this by looking up and down (or nodding ‘yes’) and stopping at a relaxed position with a slight bias towards chin down.
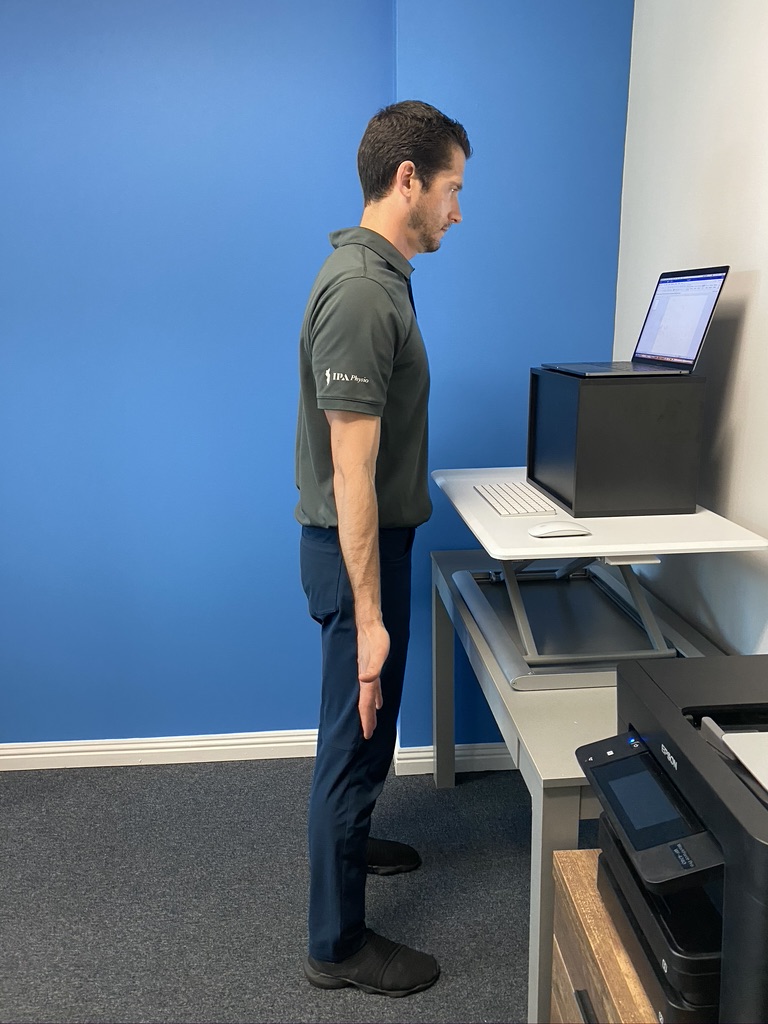
Opening shoulders in standing 
Opening shoulders in sitting
Workstation Setup
Desk Height
The desk should be a height that allows your forearms to be horizontal or slightly down-sloping while working. This may require you to increase the height of your chair, unless your desk height is adjustable. If you have to increase the chair height, make sure your feet are firmly supported. You may need to use a foot support.
If using a standing desk, the desk height should be as high as your elbows when your arms are bent to 90° and against the side of your body.
Keyboard and Mouse
You should not have to reach for the keyboard and mouse. If sitting, you should be close enough to the keyboard that the arms are able to rest on the chair armrests while typing. Your wrists should be in a neutral position, not tipped up or down. Dependent on the height of your desk and adjustability of your setup, a keyboard tray may be required. When typing, your wrists should NOT be resting on any surface as this puts direct pressure on the carpal tunnel. If using a standing desk, push the keyboard further back and allow the forearms to rest on the front of the desk. Make sure not to put direct pressure over the wrists. A folded towel under the forearm can help to unload the wrist.
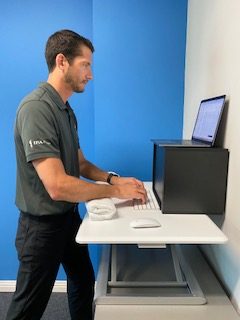
This post from Cornell University expands on the topic of keyboard setup and typing posture.
Monitor Height
The monitor should be at a height that puts the top of the screen about 2-4 inches above the horizontal level of your eyes. You should not have to look down or up. Your neck should be in a neutral, relaxed position with a bias towards chin down.
Laptop Modifications
The primary ergonomic challenge of laptop use is the keyboard/monitor relationship. Ideally, one would prop the laptop on top of something on the desk to bring it to eye level, and then utilize an external keyboard. If this isn’t doable, the keyboard height should be prioritized and the the gaze can be directed downward, without letting the neck fall down and forward. (see pictures above in standing section)
Simply Do Your Best
Sometimes it is impossible to create the perfect ergonomic workstation setup. However, small adjustments can make a big difference. Simply do your best with the information we have provided above. Always err towards a position that feels most comfortable to you and reduces any pain you may be experiencing. Ultimately, ergonomic setups are extremely individualized, and an in-person evaluation is the best way to ensure optimal outcomes. Please reach out to one of our clinics with any questions you may have.


